この記事は、Googleの画像認識AI(Vision API)でできることを一覧にした、逆引きリファレンスです。
物体検出
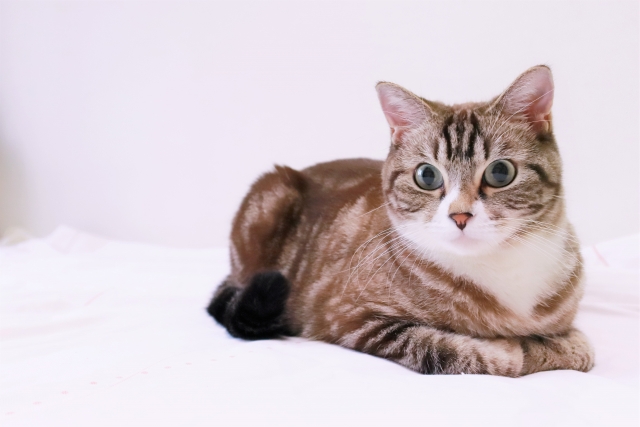
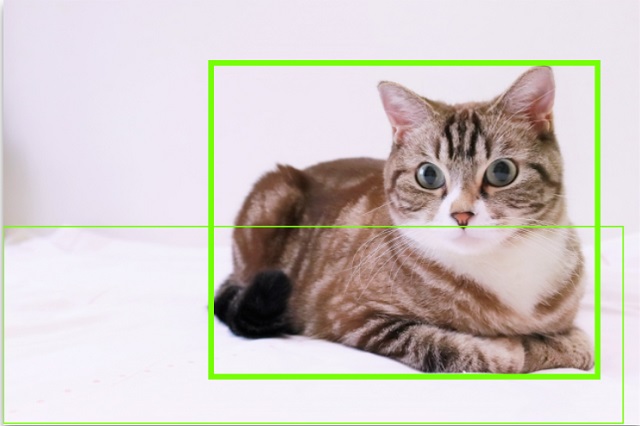
猫やベッドなどの、物体を検出するには
画像内の物体を検出するには、object_localizationを使用します。
入力画像・検出画像
Pythonサンプル
from google.cloud import vision
from google.oauth2 import service_account
import io

# 身元証明書のjson読み込み
credentials = service_account.Credentials.from_service_account_file('key.json')
client = vision.ImageAnnotatorClient(credentials=credentials)

# ローカル画像を読み込み、imageオブジェクト作成
with io.open("./input1.jpg", 'rb') as image_file:
    content = image_file.read()
image = vision.Image(content=content)

# Cloud Vision APIにアクセスして、物体検出結果を受け取りobjectsに格納
response = client.object_localization(image=image)
objects = response.localized_object_annotations

# 検出物体を順に表示
for object in objects:
    print(object.name)
実行結果
Cat
Bed
CatとBedを、正しく検出できています。
ラベル検出
茶色・肉食動物、などの関連ラベル(単語)を検出するには
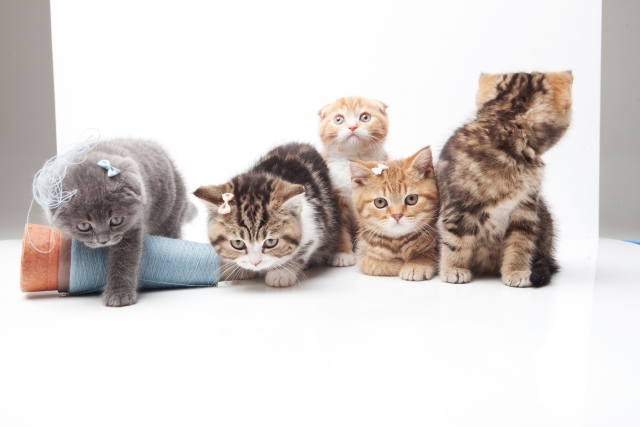
画像に関連するラベル(単語)を検出するには、label_detectionを使用します。
入力画像
Pythonサンプル
from google.cloud import vision
from google.oauth2 import service_account
import io

# 身元証明書のjson読み込み
credentials = service_account.Credentials.from_service_account_file('key.json')
client = vision.ImageAnnotatorClient(credentials=credentials)

# ローカル画像を読み込み、imageオブジェクト作成
with io.open("./input1.jpg", 'rb') as image_file:
    content = image_file.read()
image = vision.Image(content=content)

# Cloud Vision APIにアクセスして、ラベル検出結果を受け取りlabelsに格納
response = client.label_detection(image=image)
labels = response.label_annotations

# 検出ラベルを順に表示
for label in labels:
    print(label.description)
実行結果
Brown
Cat
Felidae
Carnivore
Small to medium-sized cats
Whiskers
Fawn
Comfort
Pet supply
Fur
上記の通り、10個のラベルを検出できています。
テキスト検出(OCR)
画像からテキストを検出するには
Googleの画像認識AI(Vision API)で、画像からテキスト検出するには、text_detectionを使用します。 英語・日本語の両方を抽出可能です。 画像からテキスト検出(OCR)するには【Google Cloud】 入[…]
テキスト抽出結果をテキストファイルにするには
Googleの画像認識AI(Vision API)で、画像内のテキスト検出(OCR)した結果をテキストファイルにするには、text_detectionを使用します。 テキスト検出結果をテキストファイルにするには 入力画像・検出画像 下[…]
顔検出
顔写真から感情を判定するには
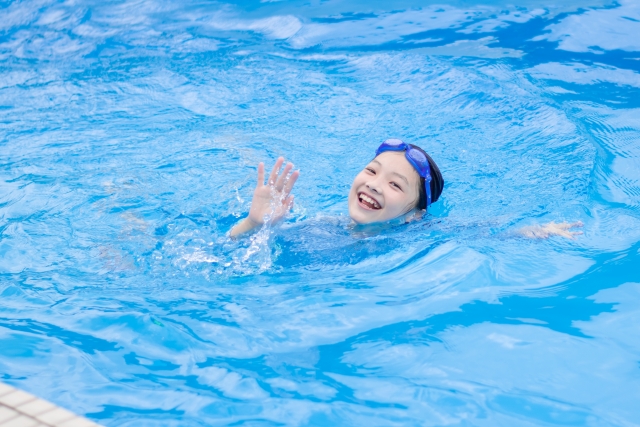
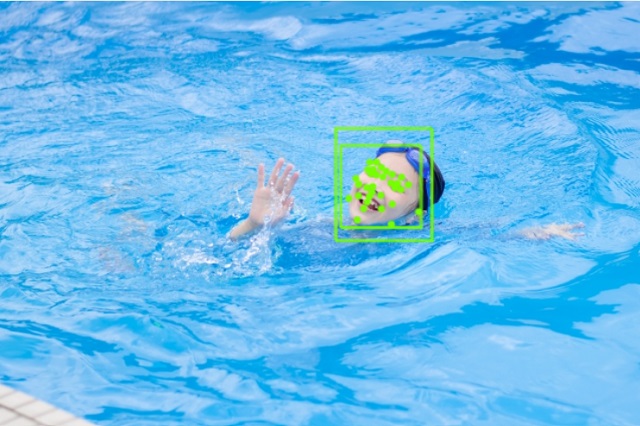
顔画像から感情を判定するには、face_detectionを使用します。
入力画像・検出画像
Pythonサンプル
from google.cloud import vision
from google.oauth2 import service_account
import io

# 身元証明書のjson読み込み
credentials = service_account.Credentials.from_service_account_file('key.json')
client = vision.ImageAnnotatorClient(credentials=credentials)

# ローカル画像を読み込み、imageオブジェクト作成
with io.open("./input1.jpg", 'rb') as image_file:
    content = image_file.read()
image = vision.Image(content=content)

# Cloud Vision APIにアクセスして、顔検出結果をjsonで受け取り、facesに格納
response = client.face_detection(image=image)
faces = response.face_annotations

# 喜怒哀驚の表情の類似度を表示
likelihood_name = ('UNKNOWN', 'VERY_UNLIKELY', 'UNLIKELY', 'POSSIBLE', 'LIKELY', 'VERY_LIKELY')
for face in faces:
    print('joy: ' + likelihood_name[face.joy_likelihood])
    print('anger: ' + likelihood_name[face.anger_likelihood])
    print('sorrow: ' + likelihood_name[face.sorrow_likelihood])
    print('surprise: ' + likelihood_name[face.surprise_likelihood])
実行結果
joy: VERY_LIKELY
anger: VERY_UNLIKELY
sorrow: VERY_UNLIKELY
surprise: VERY_UNLIKELY
joy: VERY_LIKELYという実行結果が得られていることから、楽しい表情の雰囲気を検出できています。
顔の数を検出するには
以下の記事にまとめています。よろしければ、ご確認ください。
Google CloudのVision APIで、画像内の顔の数を検出するには、face_detectionを使用します。 顔の数を検出するには 入力画像・検出画像 サンプルコード 実行する場合、APIキーファイルをGCPからダ[…]
Pythonサンプル使用の前提
・Google Vision APIを有効に初期設定済み
・Google Vision APIのサービスアカウントキーファイル(json)を、自分のPCにダウンロード済み
上記の準備の上、ご使用ください。

