Cloud Vision APIでローカル画像を画像認識するには、io.openを使用します。
ローカル画像を読み込むには
まずio.openでローカル画像を読み込み、imageオブジェクトを作成します。
with io.open("./neko.jpg", 'rb') as image_file:
    content = image_file.read()
image = vision.Image(content=content)
上記のimageオブジェクトを使って、画像認識するためにCloud Vision APIにアクセスし、responseを受け取ります。
response = client.object_localization(image=image)サンプルプログラム
### sample.py ###
# ローカル画像から物体検出するサンプル #

from google.cloud import vision
from google.oauth2 import service_account
import io

# 身元証明書のjson読み込み
credentials = service_account.Credentials.from_service_account_file('key.json')
client = vision.ImageAnnotatorClient(credentials=credentials)

#ローカル画像を読み込み、imageオブジェクト作成
with io.open("./neko.jpg", 'rb') as image_file:
    content = image_file.read()
image = vision.Image(content=content)

#Cloud Vision APIにアクセスして、物体検出
response = client.object_localization(image=image)

# 物体検出結果を表示
print("物体検出:./neko.jpg")
labels = response.localized_object_annotations
for label in labels:
    print(label.name + ":" + str(label.score))

# エラー処理
if response.error.message:
    raise Exception(
        '{}\nFor more info on error messages, check: '
        'https://cloud.google.com/apis/design/errors'.format(response.error.message))
入力画像
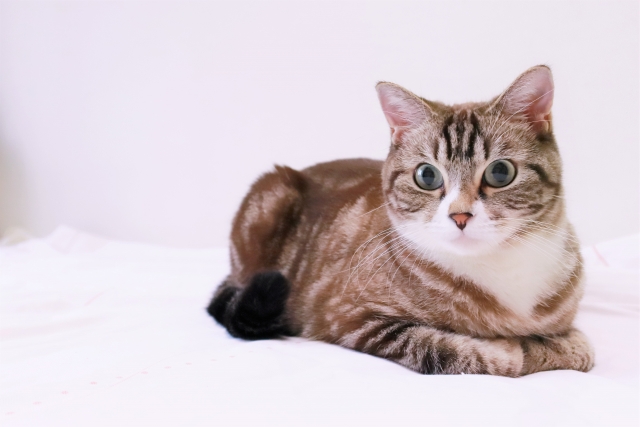
例として、サンプルプログラムで次のneko.jpgを、画像認識してみます。
まず下記画像を、上記のsample.pyと同じフォルダに置きます。

neko.jpg
実行コマンド
>py sample.py結果表示
実行すると、以下の物体検出スコアが表示されます。
物体検出:./neko.jpg
Cat:0.9583572149276733
Bed:0.6161924004554749猫が95%、ベッドが61%のスコアで、検出できています。
まとめ
本記事では、Google Cloud Vision APIで、ローカル画像を画像認識する方法をまとめました。
みなさんも、Google Cloud Vision APIを使って、いろいろな画像を画像認識して遊んでみてはどうでしょうか。
今回は以上です。

